Ubuntu on Azure
I have decided to move my projects to use Clang on Linux. The primary reason that spurred this decision is to be able to keep pace with the latest C++ features. C++14 refines C++11 and makes the language much more intuitive and concise. This being said, I need a compiler that supports the latest language features and currently Clang is king of feature support. I could whine about Visual Studio but it is a great IDE. I use Visual Studio daily, and will continue to use it in projects when I see fit. However, right now for this blog, Ubuntu, Emacs and Clang is my new platform.
It has been six years since I last developed on Linux, and it seems some things have changed since then. As such, I have put together a guide to make setup as easy as possible. This guide is exactly how I have my machine setup and once you have your Ubuntu machine running all you have to do is run a single line of shell commands I have put together.
The Machine
First, thing you are going to need is your Linux machine. Sure you could grab an old laptop, dual boot, or install a local VM, hell you might even have a server at home to run your VM on. If so, you will want to head over to http://www.ubuntu.com/download/server and download an ISO and install it. This is not what I did. To make things easy, and to have a VM that I could access from anywhere, I created a cloud VM on Microsoft’s Azure platform.
If you are unfamiliar with Azure, go to http://azure.microsoft.com/ and click the Free Trial button in the top right corner. You will get free credits to spend on Azure services and if you manage them correctly they will last you quite a long time.
Azure Ubuntu Server 14.04 LTS
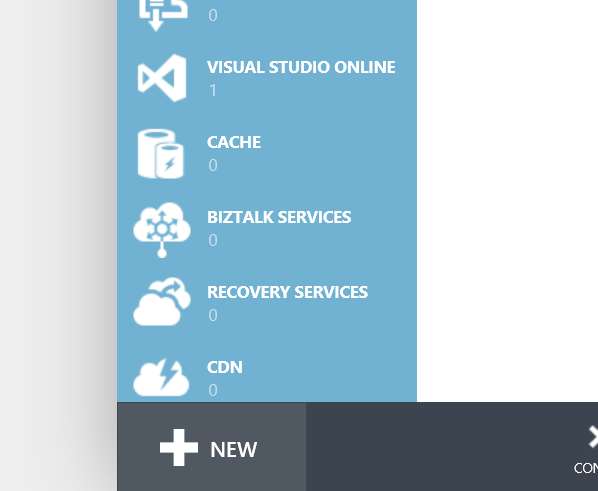
Once you have your Azure account setup, you need to create your Linux VM. Go to your Portal. Click the Virtual Machines tab and down at the bottom left click “New”, which looks something like:
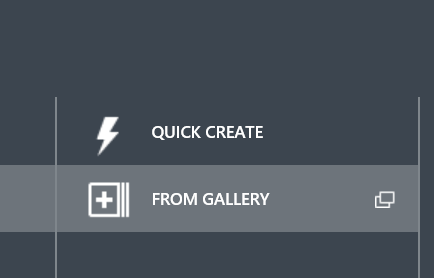
Then click “From Gallery”:
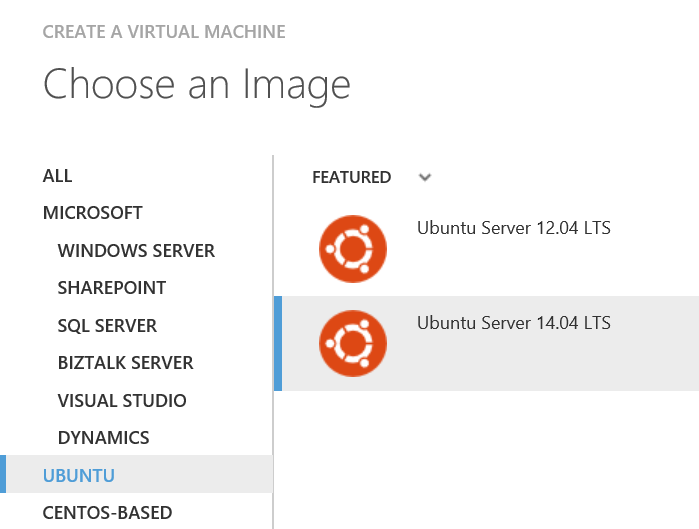
Then Choose an Image, selecting Ubuntu, and then Ubuntu Server 14.04 LTS:
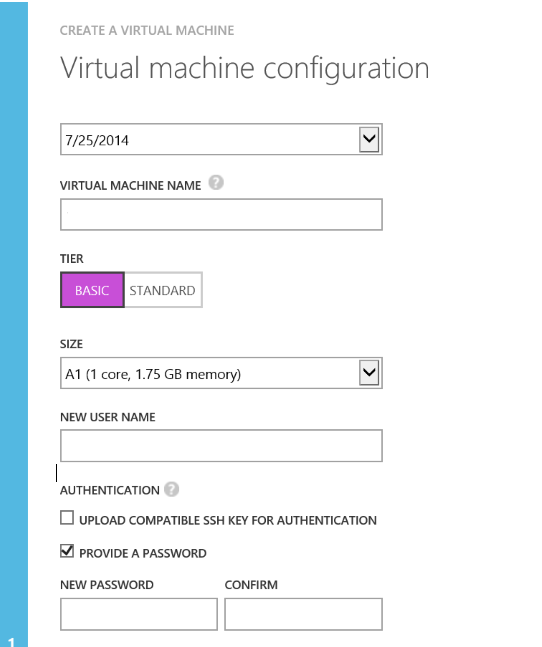
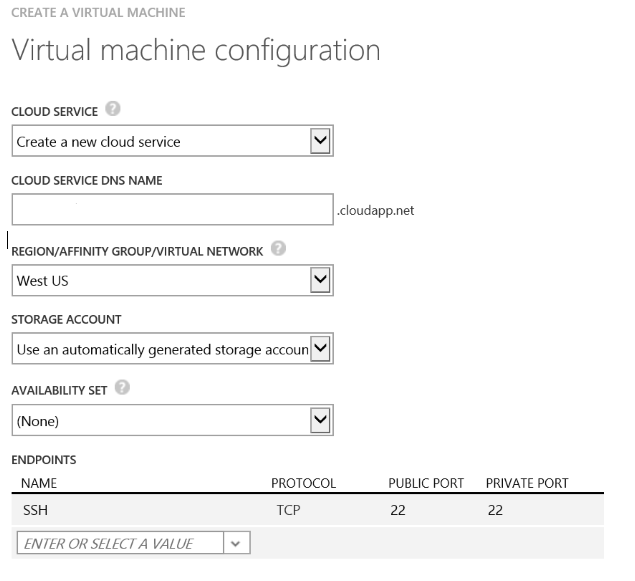
Now configure your VM with the following options. Basic A1 is the second cheapest at $55 per month and Basic A0 is cheaper at $13 per month. I recommend using Basic A1 at least while you setup the machine so that it doesn’t take hours, you can switch to Basic A0 afterwards. The user name and password will be used to log into your VM:
Next you will choose the region for your VM, generally you want the VM close to you. Also set the “Cloud Server DNS Name”, which is the the address you will use to SSH into the VM. To add other “services” to your VM such as RDP or VNC you will add the appropriate endpoints to the Cloud Service you are setting up now.
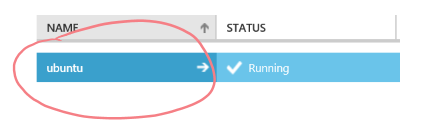
Click through the rest of the setup and wait about 5 minutes for Azure to provision your brand spanking new Ubuntu VM. Head over to your Virtual Machines portal and when Status says “Running”, click the circled area:
You will be at your VM’s Azure Portal and can get all sorts of useful information like the server load and the address for the service and SSH endpoint you set up earlier (under quick glance “SSH Details”). Copy the address under SSH Details.
Accessing the VM
To access your VM you need an SSH client. On Windows, I recommend KiTTY, it is a branch of the long-time popular open source PuTTY. Download KiTTY
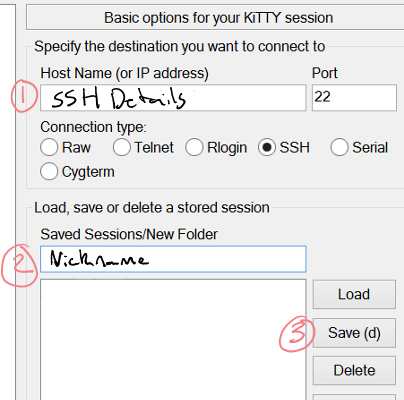
Open KiTTY. Fill out the SSH Details you copied earlier. Give the connection a nickname. Save.
Now click Open in the bottom left of the KiTTY window. This will connect your with your Azure VM. You will get a warning because you didn’t upload an SSH certificate, click Ok. And then enter your username and password which you setup earlier in the Azure portal.
You now have a Linux VM in the cloud, and that probably didn’t take you any more than 10 minutes!
Setting Up Your Ubuntu VM
I have to credit Solarian Programmer for providing many of the next steps. However, I have modified and added to them so that they will work with your Azure Ubuntu 14.04 VM. The steps on Solarian will not work for Ubuntu 14.04.
You can follow each step individually, or you can just copy the all in one version
All Steps in One
This is all the steps for setting up your Ubuntu VM concatenated into a single command. After pasting this into your command prompt, you will have to stick around for a few minutes to type ‘y’ and ‘enter’ a few times. Do not close KiTTY or let your computer go to sleep because your session will time-out and your VM will not be set up properly.
sudo apt-get update -y && sudo apt-get upgrade -y && sudo apt-get install g++ subversion cmake emacs git xdg-utils htop ncurses-dev -y && sudo mkdir repos && cd ~/repos/ && sudo mkdir clang && cd clang && sudo svn co http://llvm.org/svn/llvm-project/llvm/branches/release_35/ llvm && cd llvm/tools && sudo svn co http://llvm.org/svn/llvm-project/cfe/branches/release_35/ clang && cd ~/repos/clang && sudo mkdir build && cd build && sudo ../llvm/configure --enable-optimized --enable-targets=host --disable-compiler-version-checks && sudo make -j 8 && sudo make install && cd ~/repos/clang && sudo svn co http://llvm.org/svn/llvm-project/libcxx/trunk libcxx && sudo mkdir build_libcxx && cd build_libcxx && sudo CC=clang CXX=clang++ cmake -G "Unix Makefiles" -DLIBCXX_CXX_ABI=libsupc++ -DLIBCXX_LIBSUPCXX_INCLUDE_PATHS="/usr/include/c++/4.8;/usr/include/x86_64-linux-gnu/c++/4.8" -DCMAKE_BUILD_TYPE=Release -DCMAKE_INSTALL_PREFIX=/usr $HOME/repos/clang/libcxx && sudo make -j 8 && sudo make install && xdg-mime default emacs.desktop text/plain && cd ~/repos/ && sudo git clone https://github.com/brianrackle/brainstem_breakfast.git && cd brainstem_breakfast/source && sudo clang++ --std=c++14 --stdlib=libc++ main.cppEach Step Explained
Here is all the steps you need to get your Ubuntu installation up and running with a great compiler. Just copy each line individually into the command line, and by the end you will be redy to develop on Linux. These commands are the same as the above commands, but are seperated for easy viewing.
Initialize Environment
Here we update the software on the VM and install some new software.
sudo apt-get update -y
sudo apt-get upgrade -y
sudo apt-get install g++ subversion cmake emacs git xdg-utils htop ncurses-dev -y
sudo mkdir repos
Pull Clang and LLVM
Get the source code for Clang and LLVM. LLVM is the backend technology that Clang is built upon.
cd ~/repos/
sudo mkdir clang
cd clang
sudo svn co http://llvm.org/svn/llvm-project/llvm/branches/release_35/ llvm
cd llvm/tools
sudo svn co http://llvm.org/svn/llvm-project/cfe/branches/release_35/ clang
Build Clang and LLVM
Build and install Clang.
cd ~/repos/clang
sudo mkdir build
cd build
sudo ../llvm/configure --enable-optimized --enable-targets=host --disable-compiler-version-checks
sudo make -j 8
sudo make install
Pull and Make libc++
Get the libc++ source and build it with Clang. libc++ is a newer C++ STL implementation.
cd ~/repos/clang
sudo svn co http://llvm.org/svn/llvm-project/libcxx/trunk libcxx
sudo mkdir build_libcxx
cd build_libcxx
sudo CC=clang CXX=clang++ cmake -G "Unix Makefiles" -DLIBCXX_CXX_ABI=libsupc++ -DLIBCXX_LIBSUPCXX_INCLUDE_PATHS="/usr/include/c++/4.8;/usr/include/x86_64-linux-gnu/c++/4.8" -DCMAKE_BUILD_TYPE=Release -DCMAKE_INSTALL_PREFIX=/usr $HOME/repos/clang/libcxx
sudo make -j 8
sudo make install
Setup Emacs
Emacs is my code editor of choice on Linux. This will set Emacs as the default text editor.
xdg-mime default emacs.desktop text/plainUse Git and Compile BSB
Use Git to pull some source code (the brainstem breakfast code) and compile it using clang.
cd ~/repos/
sudo git clone https://github.com/brianrackle/brainstem_breakfast.git
cd brainstem_breakfast/source
sudo clang++ --std=c++14 --stdlib=libc++ main.cpp
If you are able to compile the BSB source then you have successfully set up you Clang on Ubuntu and you can now write C++14 code.
Enjoy your new Linux environment. If you have any problems, let me know in the comments or over twitter and I will do my best to help you.
Cheers! Brian